Thursday, June 28, 2012

Crayon Batik - Guest Post

(It's fabric dyeing week over here at Seamstress Confessions! Yesterday you saw my trials and tribulations with solid color dyeing... today my good friend Shaylynn is going to introduce you to a mock batik dying with crayons!)

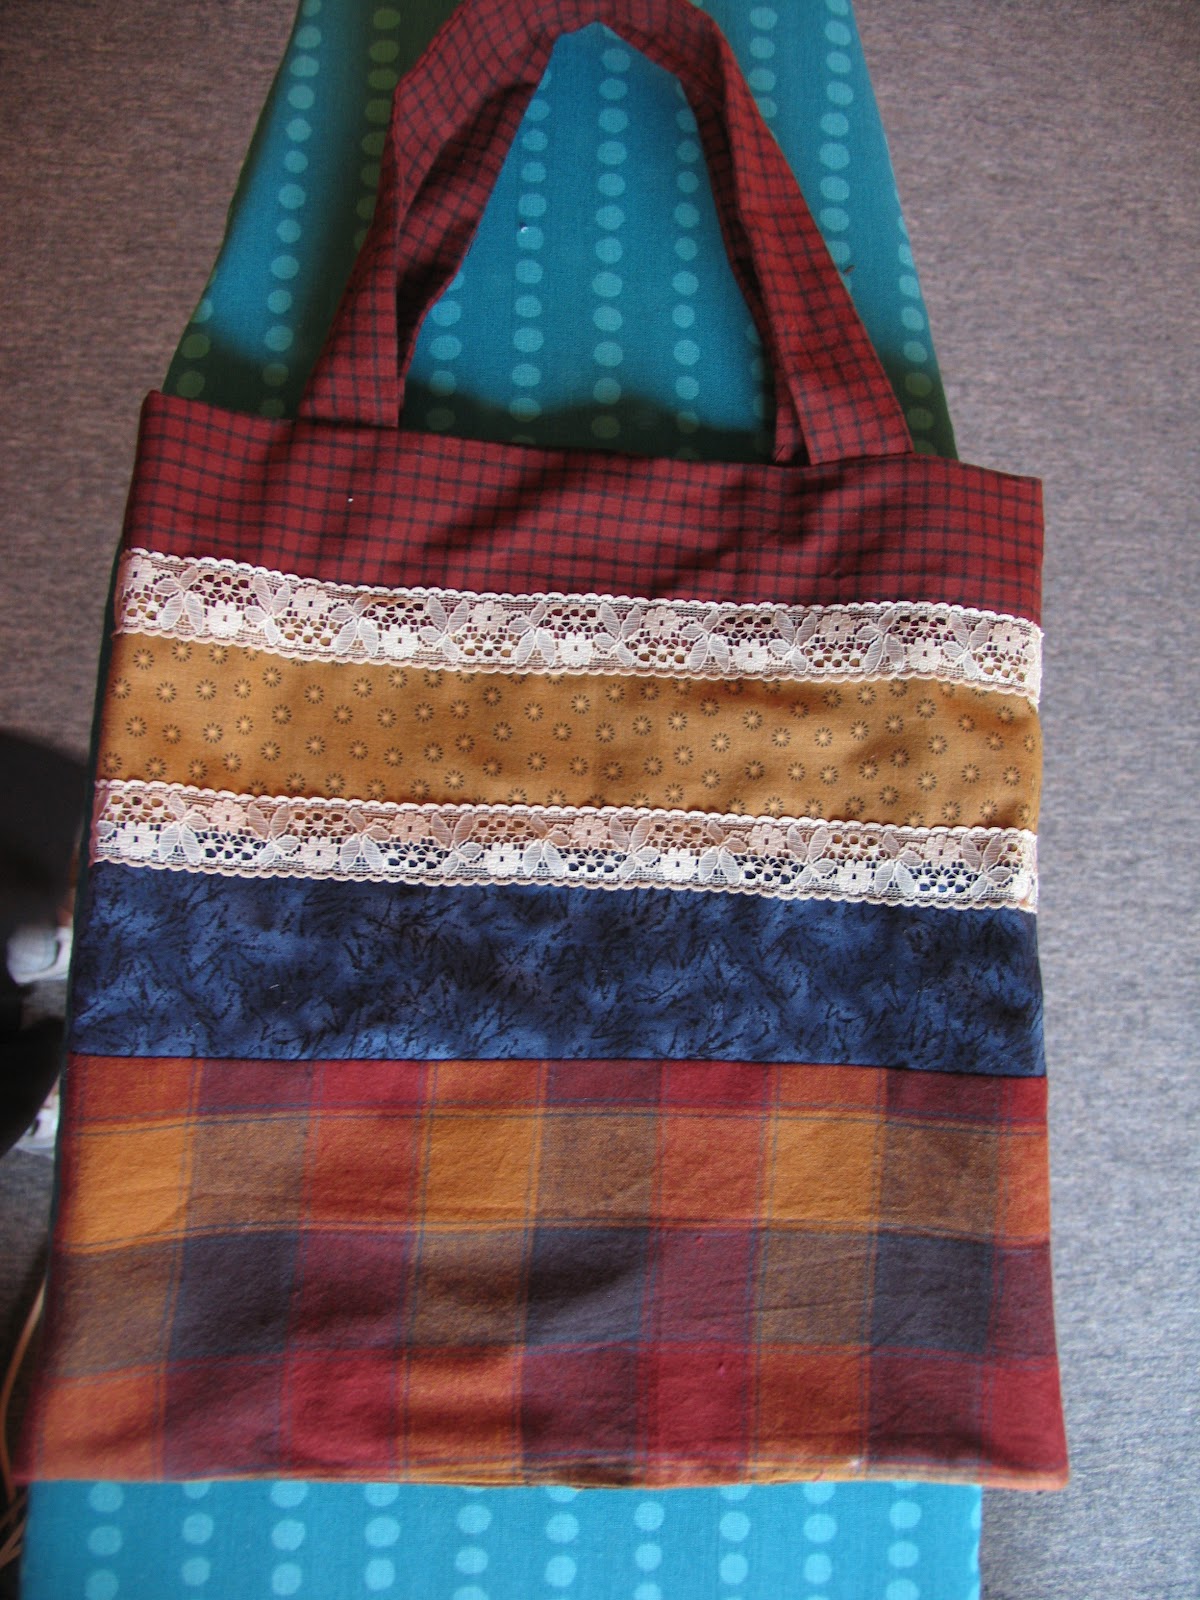
Hey, everyone! This is Shaylynn from Shealynn's Faerie Shoppe. Thanks so much to Elena for allowing me to guest post! Today I'm going to teach you how to dye fabric using crayons. You can make something like this:


It all began with Ukrainian eggs! A couple of months ago, I was excitedly talking to my art teacher about pysanky, in which eggshells are decorated with bright dyes using a wax-resist technique. This made her remember a project that she did in art school: batik.

Those of you who frequent fabric stores might recognize that word. The really pretty, brilliantly colored fabrics with intricate designs at around $15 a yard? Yup. Those are imitation batik fabrics. Traditional batik is even more expensive because of the ardourous handmade process. A swath of fabric is dyed in a light color, and then beeswax designs are drawn onto the fabric by hand to "lock in" the light color. The fabric is then dipped in a darker color and waxed again, and the process is repeated many times before the dye is allowed to set and the beeswax is removed.

Just as I made Sharpie Easter eggs because I didn't have the tools for pysanky, we figured out how to "cheat" at batik using crayons! (It's not an original idea-- I had seen it done once before on a blog called Suzy's Artsy-Craftsy Sitcom).

This is definitely a do-and-learn project. If you attempt it and have any tips for me, please share!

DIY Crayon Batik
Supplies
Crayons (the perfect way to use up that old box of broken crayons-- my family had two shoeboxes full, but we only used half a box in art class, shared between six or seven batik projects)
Muffin pan (mini muffin pan recommended for lots of colors/mixing)
Heating tray or oven
White cotton fabric
Cold water dye (hot water will melt the wax) and gloves
Cheapie paintbrushes
Iron
Newspaper

Now, the whole idea is that you paint the crayon wax onto the material, crumple it, spray the black dye into the cracks in the wax, and iron the wax off the material. The dye from the crayon will remain, all pretty and bespeckled with the black dye.

And as a bonus, you get these weird flat crayon discs.

I've all sorts of pictures to help you along. :)

Start by peeling the crayons and putting them in a muffin pan. Melt them on a heating tray (or in the oven-- beware that they will cool quickly in that case). Then prepare your design on the cotton.


(At this point I'm going to point out that my Celtic knot is not a real knot because I made several mistakes in the over-under pattern!)

front
back
Use cheap paintbrushes to paint the melted crayon onto the cotton (the paintbrushes will be ruined). Once the wax is on, there is no getting it off-- so be careful! Start with the main design first.


Make sure that the crayon has completely permeated the material. I set the cotton on the heating tray between each color to make sure that the dyes really "set."

This is important! We ruined our first attempts because crayon cools quickly and cool wax just sits on top of the fabric. The color didn't set.

Front

Back
Continue this process until the entire piece is covered with crayon.

This was my first project, a pseudo "Dan-Cheong" based off a Korean style of architectural painting.
 I did not heat the material between colors. Instead, I melted everything all at once and made the colors run.
Be sure to melt the wax between each color and pay attention because you don't want the colors to run together.

Then wrinkle it up!

Every time you wrinkle the fabric, it creates cracks for the black dye to seep into. Don't wrinkle too much or else your final piece will be almost completely black. (Yes, another thing learned the hard way.)


Spray the dye onto the material and let it set as per label instructions.


Next, place the material between layers of newspaper and heat the iron to the highest setting.

Iron the wax out of the cotton.

This is a tedious process. DON'T keep ironing after the wax is showing through the newspaper or you will do what I did and re-melt the wax back into the material, creating a big mess and making colors run. Change the newspaper several times a minute.

Iron until the fabric loses its stiffness. Rub the material with a paper towel. If no color rubs off, you are good to go.


I haven't tried putting this through the wash. I figure that as long as no color rubs off, it isn't going to stain anything.


Do whatever you want with your handmade art fabric! I turned mine into a decorative pillow, proving that I cannot sew a straight line (it's horribly loppy!). Now my Celtic-knot obsession gets to live on my bed! It even matches my curtains. :)


Enjoy! Thanks for having me over here on your blog, Elena!

By the way, you should totally check out Elena's SUPER GEEKY AWESOME guest post over at my blog! I'm not going to tell you what it is. Drop whatever you are doing and go check it out.

Wednesday, June 27, 2012

Trials and Tribulations of Dyeing Fabric

Once upon a time, there was a seamstress who was commissioned to make a project with corduroy and velvet that were the exact same shade of seafoam. Rather than say "You absolutely must buy two matching fabrics" to the customer, she said "hey, so I could dye it..." because she'd been wanting to do more dying for quite awhile.

Said seamstress has a habit of taking on big projects that might be more trouble than their worth.

What happened? Read on!


 Regina Doman got me into using Dharma Trading Company's Fiber Reactive Dyes. To create the color I needed, I got their starter kit, as well as their seafoam and their baby blue. The kit is quite good, and the process looks complicated when you first start out, but it quickly becomes second nature (and you don't have to be 100% exact with the timing - play around!)

However, I started out using a rayon silk blend, and after four dye baths I really could not get close to the color I needed (the middle scrap above).


I needed something that would actually dye right to encourage me, so I threw the above skirt into a bath to see if I couldn't brighten it up.


Above - my dying set up. Next time I do dying, I'm going to pick up some measuring cups and spoons and stuff at the thrift store. I didn't prepare well enough this time, and had to make my own out of plastic disposable tupperware stuff.


The Fabric, still wet, but rinsed.


Still didn't work! (Batch #5 is the second seafoam square on the upper left.)


Here you can see the full thing... it's hard to tell shades, but it was too green and too light.


Green skirt didn't get nearly enough color. So I try again, and throw a white skirt in as well.


Uno, dos, tres... round #7? Will it work?


Green skirt turned out lovely!


Velvet ended up too blue... at this point I decided to scrap the silk rayon blend and start over, with plain cotton velvet.


You can see the color of the white-turned-pink skirt here, it was very vibrant and summery!


And here, at last, is the velvet! (required three more tries to get it right!). The picture doesn't do it justice, both fabrics have more green in them and are a closer match than they look here. It'll show up better in the later pictures I took of the project in progress. (stay tuned!)

Sunday, June 24, 2012

A Post of Bags (Superheros and otherwise)

I've been a bit obsessed with making bags lately. Not because they're more fun than costumes, but because they make really good gifts and are a great way to utilize fun fabric. 


Above - a tote bag I made for my grandmother.


Came across this awesome Marvel fabric while it was on sale, right before my friend Alicia's birthday. I decided to make her a backpack purse out of it.


Lined, with reinforced seams (zigged because I didn't have my serger yet, this was back in May!)


Kind of especially proud of the square box bottom I put in.


Sorry about the sideways pictures, I don't know why these didn't get rotated!


And I had enough fabric left over to make a pencil bag for my friend Shannon, but unfortunately I didn't manage to get a picture of that before I sent it off. Boo!

Saturday, June 23, 2012

Dress Deconstruction

I have a lot of costumes. And that's an understatement. There are six big tubs out in the garage, and about six feet of hanging creations in our laundry room. There comes a time when I have to go through and be honest about what I can keep.


This dress was one of the first costumes I made, back when I was about 11 or 12. It is made from velvet and an embroidered cotton left over from our living room curtains.

It is also entirely handsewn.

Unfortunately, a decade or so later there's not much I can do with it. It doesn't fit me, or anyone else I'm likely to do a photoshoot with, and is much too fragile to rent or lend out. And I have so many costumes that keeping one sheerly for sentiments sake is completely impractical. Especially when the fabric is still good. So I cut it apart and will be reusing the fabric in other projects.


This is another early creation that also isn't good for much now, as it is rather baggy and short and doesn't fit a particular time period. So it also got attacked with a scissors and will now be reused in other projects.


Was it sad to cut these costumes up? Yeah. But since there was no way to use them, or in the case of the velvet even keep without major restoration work, it seemed a really practical thing to do. And I have really exciting ideas about what I'm going to do with the fabric, so stay tuned!

Friday, June 22, 2012

THE SERGER

So last week I was in JoAnn's and they were selling some of their floor model machines. Guess what I got?


$800 serger machine for $300. 


For those of you who don't know, a serger is the machine used to create the seams you see most often on t-shirts and other clothing made from knit fabric. It also works much faster than a typical home sewing machine. Finally it is the way to finish off interior edges so they don't fray. Remember all those french seams I had to put in my organza? No more!


Yeah the inside is kind of scary.

What's really exciting is that it is a five thread overlock. I was really afraid that I wouldn't be able to afford more than a four thread, which can't even do half of what a five thread can do. God is good!